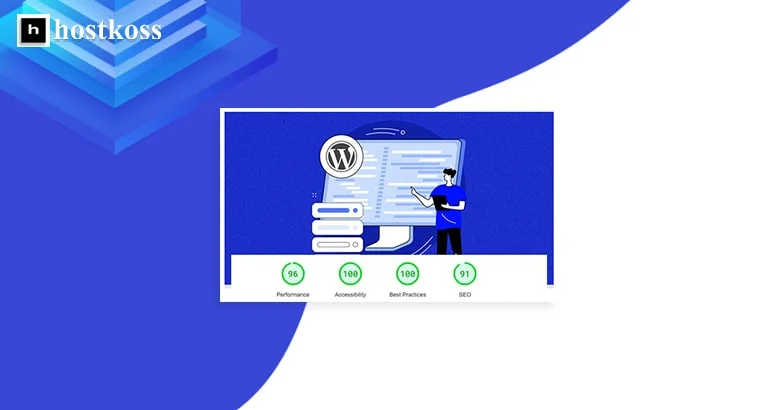
We all know that page load speed is very important. And it’s not just impatient users – Google is keeping an eye on it too! Speed is a Google-approved ranking factor for both desktop and mobile searches, and it can make or break your revenue stream.
But sadly, many WordPress sites move at a snail’s pace. 🐌
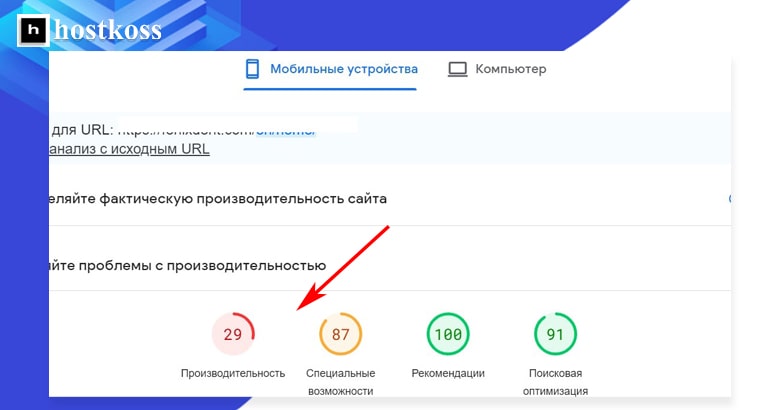
Let me paint you a picture with a real-world example. I ran a mobile page load speed test with PageSpeed Insights, and let’s just say it wasn’t pretty. 😬
So what is the secret sauce? Let me tell you all about it in this step-by-step guide:
- Say goodbye to unused plugins. 🧹
- Switch to Cloudflare’s DNS service to get a faster route. 🌐
- Install a caching plugin to serve your content like a pro. 📦
- Minimize code by making it simple and easy to use. 💪
- Combine CSS and JavaScript files to reduce clutter. 🧩
- Eliminate annoying resources that interfere with page display. 🚧
- Do away with delayed loading of images and videos to keep things running smoothly. ⏳
- Optimize your Google fonts so they look great and load quickly. 📚
- Enable preloading to get ahead of your visitors. 🏎️
- Utilize CDN capabilities to download content quickly. 🌍
- Don’t forget to optimize images – they are very heavy! 🖼️
By following these steps, you’ll turn your WordPress site into a speed demon that will have your users and Google bots grinning from ear to ear.
IMPORTANT.
So, before we get into the optimization extravaganza, it should be noted that some of these solutions may require the use of a premium🚀 WPRocket plugin. While we’ve tried to include a few free alternatives, it’s worth remembering that plugins can sometimes conflict like stubborn siblings. 🙄
Step 1: Free your site from unnecessary plugins
If your WordPress-based website has been around for a while, it probably has a backlog of plugins that you haven’t used in a while. Some of them can seriously slow down your page load speed, so it’s important to do a revision and get rid of unused plugins first. 💻
However, you need to be careful before doing so. If you have any doubts about the necessity of any plugin, it is better to leave it untouched. 🤐
Step 2: Switch to Cloudflare’s DNS service to improve speed 🚀
Websites are essentially a collection of files hosted on a hard disk (server) connected to the Internet. Each device on the network has its own unique IP address, like 123.123.12.1.
But who can remember all those numbers? That’s where DNS (Domain Name System) comes into play. This system works like a directory of phone numbers. When you type a web address into your browser, DNS translates it into a corresponding IP address.
The issue is that many of us use free DNS services provided by domain name registrars. Unfortunately, these services often do not work in the fastest way.
If this is your case, it’s worth considering switching to a higher performing DNS service such as Cloudflare.
To get started, create a free account on Cloudflare. Simply click “Add a site“, enter your domain name and follow the instructions.
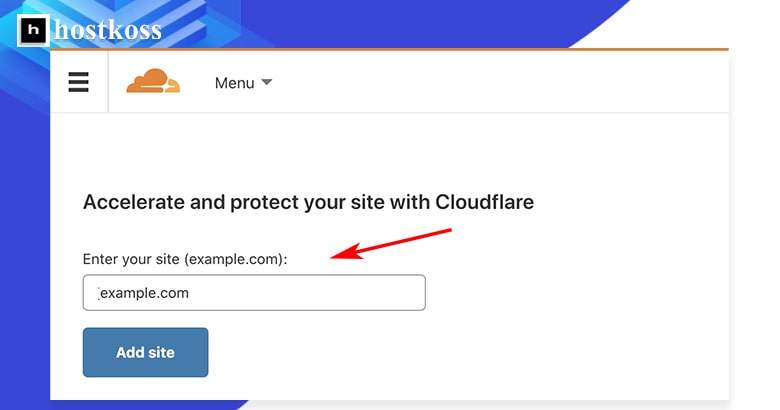
Choose a free plan and confirm your selection.
Cloudflare will give you a chance to check your DNS settings before continuing. If there are no warnings, you can move on.
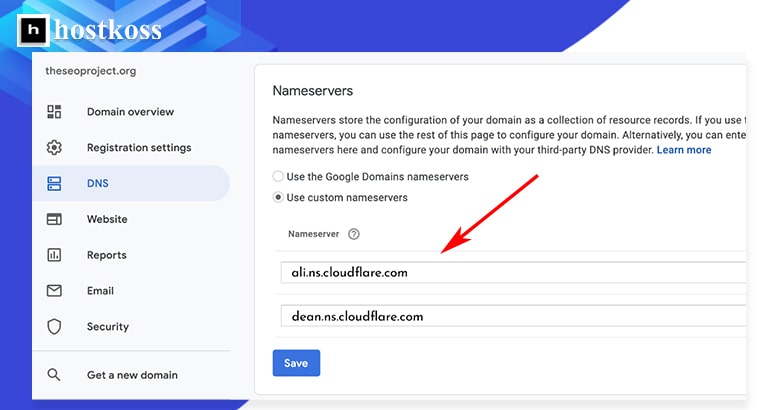
The final touch remains: change your name servers with your domain name registrar. This can vary slightly depending on your registrar, so don’t hesitate to contact their support team if you’re not sure how to do this.
If you’re using Google Domains, the process will look something like this 🔄🌐
Step 3: Introduction to the world of caching – Install a plugin to speed up your site! ⚡
Caching is a process of temporarily storing files that greatly improves the performance of your website and ensures faster delivery of content to visitors.
There are two main types of caching:
- Browser caching: This type of caching stores “typical” files, such as logos, on the user’s hard disk. This avoids re-downloading these files each time the site is visited again.
- Server caching: This type of caching stores a complete “static” version of the page on the server, allowing the server to quickly retrieve this version without having to recreate it with each request.
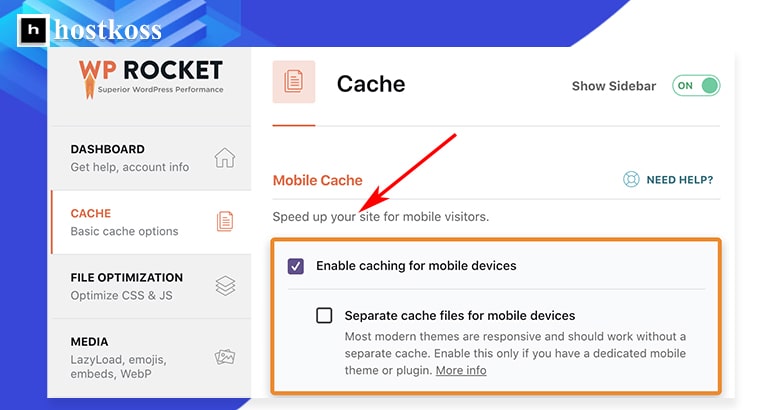
In order to implement caching on your WordPress website, it is recommended to install WP Rocket plugin. Simply purchase, install and activate this plugin. By default, WP Rocket includes basic caching settings both on the server and in the browser. If your site is adapted for mobile devices, don’t forget to enable the caching for mobile option in the plugin settings. 📱
If you’re looking for a free alternative, consider using the W3 Total Cache plugin. 🆓
Step 4. Optimize the code – Making your site easier and faster! 💡
Minification is a process that gets rid of spaces and comments in code, thus reducing its size. And the smaller the size of the files, the faster they load.
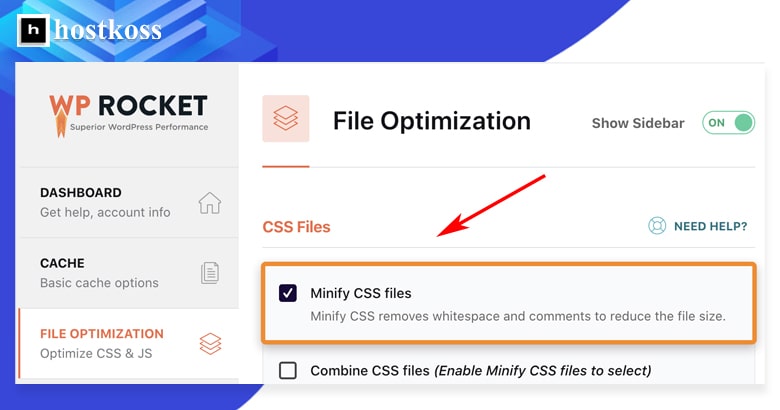
If you are using WP Rocket plugin, setting up minification of CSS and JavaScript files is very easy. Just activate the corresponding options in the plugin settings.
If you are not using WP Rocket, it is recommended to install and activate the Autoptimize plugin. Once installed, customize the CSS and JavaScript minification option by checking the appropriate checkbox.
The main rule of thumb is to always test these changes in a test environment before implementing them on a working site. Keep in mind that minification can sometimes cause problems, especially with JavaScript code, so be prepared to roll back changes if something goes wrong. 🧐
Step 5: Combining CSS and JavaScript files – The way to a faster website! 🚀
On most sites on the WordPress platform, you’ll find a lot of CSS and JavaScript files. They may be associated with themes, plugins, or may even be customized custom files.
Combining these files is one way to make your site load faster, but the result will depend on your server configuration and use of the HTTP protocol.
- Using the HTTP/1.1 protocol, CSS and JavaScript files are loaded sequentially, one by one. This means that each file must be fully loaded before the next file can be loaded.
- With the HTTP/2 protocol, files can be loaded simultaneously, allowing you to start loading multiple CSS and JavaScript files in parallel.
To determine the protocol version used on your site, you can use a speed testing tool such as KeyCDN.
If your server is running the HTTP/1.1 protocol, combining CSS and JavaScript files can noticeably speed up site loading, as there will be fewer sequential requests. However, if you’re already using the HTTP/2 protocol, you may not notice much of a change since the files are already loading in parallel.
It’s easy to use the WP Rocket plugin to combine files. Just activate the “Combine JavaScript files” and “Combine CSS files” options in its settings.
If you prefer to use the Autoptimize plugin, it also has options for merging files.
It’s important to remember that sometimes these features can affect the performance of your site, so be sure to thoroughly check that everything is working correctly after enabling them. Don’t forget to clear your cache regularly and check your site in anonymous browser mode to make sure all changes are displayed correctly.
Step 6: Optimize resources to improve content visibility 🌟
Displaying a web page is the process of converting code into what we see on the screen.
It is important to remember that a page does not have to load completely to become visible to the user.
For this reason, it is especially important to prioritize loading content that will be visible to the user immediately, without having to scroll through the page.
You can do this by delaying the loading of non-essential CSS and JavaScript files that are needed to display content below the area visible without scrolling.
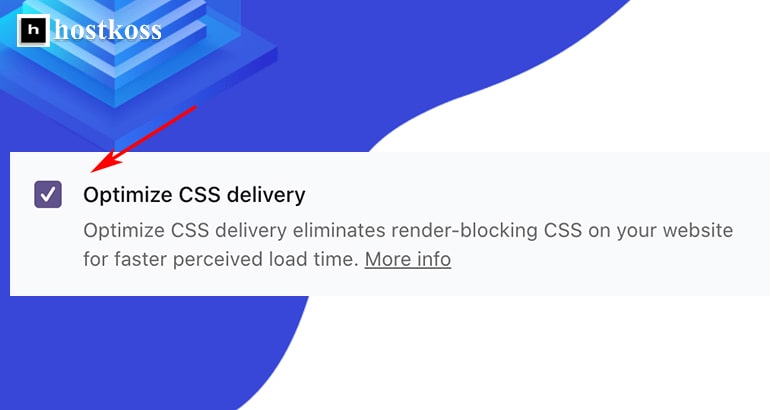
If you’re using the WP Rocket plugin, simply set the “Load JavaScript deferred” and “Optimize CSS delivery” options in its settings.
If you are not using WP Rocket, you will need to install two plugins, Autoptimize and Async JavaScript.
In the Autoptimize settings, set the “Inline and Defer CSS” option. Then, in the Async JavaScript plugin settings, activate the “Enable Async JavaScript” option.
These actions will usually resolve the “eliminate resources blocking display” issue you may find in the PageSpeed Insights tool. 🚀
Step 7: Boost speed with delayed uploading of images and videos 🖼️🎥
Deferred loading is a feature that greatly speeds up page loading by delaying the loading of images and videos until they are visible on the screen. In WordPress version 5.5+, deferred loading for images is enabled by default, but not for videos.
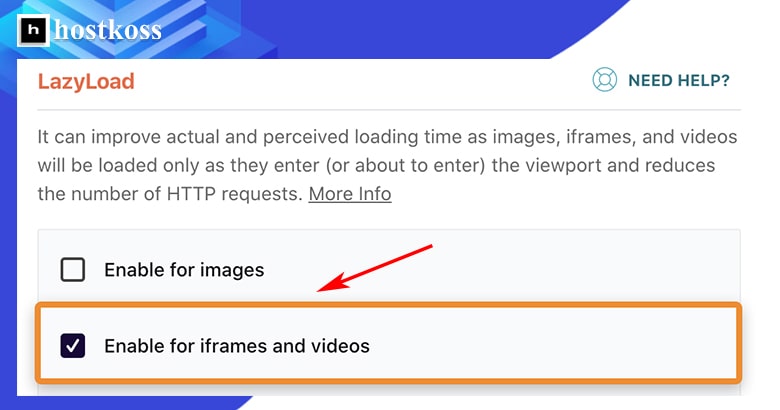
If you’re using the WP Rocket plugin, you can easily enable delayed loading for videos by checking the “Enable for iframes and videos” checkbox in the delayed loading settings.
If you’re not using WP Rocket, you can still achieve the same result by installing the Lazy Load for Videos plugin. This simple action will help improve the performance of your site, allowing you to load images and videos only when the user really needs them. 🚀📸
Step 8: Speed up your Google Fonts download for better performance 📊
Many themes and websites use Google fonts to stylize text. However, downloading these fonts from Google’s server every time you visit a website can be time-consuming. The process involves sending HTTP requests to Google’s server, downloading the associated CSS files, and finally downloading the desired fonts from the specified location in the stylesheet. And all this happens for every font on the page.
If you’re using the WP Rocket plugin, it automatically optimizes Google’s font download, making your site load faster.
If you prefer alternative solutions, the Swap Google Fonts Display plugin can be a good choice. This plugin also helps to optimize the way Google fonts load, which has the effect of improving the performance of your website.
Speeding up the loading of Google fonts is an important step in optimizing the performance of your website, as it reduces the time it takes to display content to users. 📝
Step 9: Improve boot priority with preloading 🚀
Preloading is a powerful tool for identifying particularly important resources and telling the browser to prioritize their loading.
Let’s say your code looks like this:
<html>
<head>
<script type="text/javascript" src="somefile.js"></script>
<link rel="stylesheet" href="/style.css">
</head>
<body>
Content
</body>
</html>
According to this code, the browser will load the JavaScript file first, which may not be the most optimal strategy, since the CSS file is probably more important for the page to display correctly.
An easy way to fix this situation is to add another line of code:
<link rel="preload" href="/style.css" as="style">This way, the browser is explicitly instructed to load the CSS file first, regardless of the order in the code.
Adding pre-load attributes manually can be a daunting task, especially if you’re not sure what you’re doing.
An easier and more reliable solution is to use the WP Rocket plugin, which automatically performs this task and improves the loading priority of your content.
This way, you can greatly improve your website’s performance by ensuring optimal resource utilization. 🌐📦
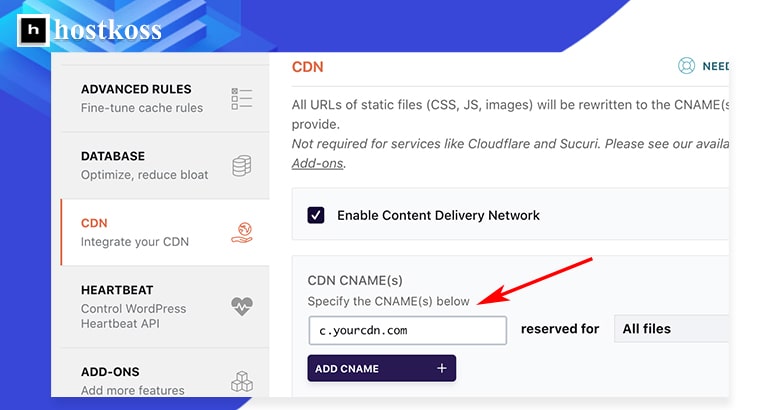
Step 10: Increase the speed of the content delivery network (CDN) 🌐
Content delivery networks (CDNs) are distributed groups of servers located around the world. Each server group contains copies of your website, allowing users to access your web pages faster.
Let’s take an example: your web server is located in the UK, but a user from the US is visiting your site. If you are not using a CDN, the connection between the user’s device and your server will be slow because the data has to travel a long distance. However, if you are using a CDN, then the user’s device will be connected to the nearest CDN server and the data will be delivered much faster.
There are many CDN providers and all you need to do is choose one of them, connect it in the WP Rocket plugin and configure the CNAME (canonical domain name).
Using a CDN is a powerful tool to increase the loading speed of your website and provide quick access to content for users in different parts of the world. It will help you create a fast and responsive web platform for your visitors. 🚀🌎
Step 11: Improve performance with image optimization 🖼️
Deferred loading solves many problems related to displaying images on your site, but it does not solve the issue of loading images that are visible without scrolling. Large image sizes can significantly slow down page loading.
To deal with this problem, it is recommended to use an image compression plugin such as Shortpixel. Install and activate the plugin, then go to its settings, enter the API key, click “Save and Go to Bulk Process”, and then “Restart optimizing“.
If you are concerned about the quality of images after compression, you can adjust the compression settings to “Glossy” (Best Quality) or “Lossless” (No Quality Loss) in the plugin settings.
Optimizing your images helps reduce file size, improves your site’s performance and reduces page load time for your users. This is an important step to ensure your website is fast and user-friendly. 🚀🌈
Conclusion!!!
All of the above steps have helped improve the performance of my site and many others. However, it’s important to realize that each site in the WordPress world is unique and may have its own characteristics.
You may have more plugins, a more complex theme, slower hosting, or more third-party tracking scripts, all of which can affect the loading speed of your pages.
If, despite the optimizations you’ve made, your site’s loading speed still leaves a lot to be desired, a custom tweak may be necessary. In this case, it is recommended to contact an experienced developer or page load speed specialist who will perform a deeper analysis and offer the best solutions for your specific site.
Keep in mind that performance improvement is an ongoing process, and it is important to regularly monitor and optimize your website to provide the best experience for your visitors.
Read also:
- What is a Content Management System (CMS)?
- How does Google indexing work?
- What is the admin panel and how to enter the site admin
- How to increase website speed with LiteSpeed Cache?
- Hosting business for resellers, expanding opportunities
- How to create a WordPress website in 2024 (a guide for beginners)
Thanks for using these tips, and good luck optimizing your web space! 🌟🌐
Questions and answers about WordPress site loading speed
Loading speed is a crucial ranking factor for search engines like Google, as faster-loading sites tend to rank higher in search results, leading to increased visibility and traffic.
Common causes of slow loading speed in WordPress sites include large images, excessive plugins, outdated themes, inadequate hosting, and poorly optimized code.
Yes, you can improve loading speed without compromising content quality by optimizing images, leveraging browser caching, minifying CSS and JavaScript, implementing a CDN, and fine-tuning server performance.
While technical expertise can be helpful, many optimization techniques can be implemented using user-friendly plugins and tools available within the WordPress ecosystem.
It’s recommended to monitor your site’s loading speed regularly, ideally on a weekly or monthly basis, to identify any performance issues and take proactive measures to address them.
While hiring a professional can be beneficial, many optimization techniques can be implemented independently by following online guides and tutorials, saving both time and money.